You've made a smart investment in your car's future by getting paint protection film (PPF). It’s the unsung hero, the invisible shield taking the brunt of rock chips, stray scratches, and daily road grime. But to keep that shield working for you, it needs the right kind of care.
Simply put, how you wash your car matters a lot more now. Using a pH-neutral car soap, a quality wash mitt, and gentle drying techniques is the name of the game. The goal is to avoid anything that could compromise the film—no harsh chemicals, no abrasive tools, and definitely no high-pressure water blasting the edges.
Why Your PPF Cleaning Method Matters

Think of your PPF as a high-performance part of your vehicle. You wouldn't put the wrong fuel in a performance engine, right? The same logic applies here. This film is an advanced piece of technology designed to protect your factory paint, but improper cleaning can actually do more harm than good.
We see it all the time with new automotive clients in Woodstock and Acworth, GA. They come in with a film that's yellowing, peeling, or has lost its slick, glossy finish. More often than not, the culprit is a poor wash routine. Harsh, acidic, or alkaline cleaners can eat away at the film's top coat, which is what gives it those amazing self-healing and hydrophobic (water-repelling) properties.
The Foundation of Proper PPF Care
A solid cleaning routine for your car is about more than just looks; it's about preserving the very technology you paid for.
When you clean your PPF the right way, you’re ensuring:
- Lasting Clarity: The film stays crystal clear and glossy, so your car always has that "just detailed" shine.
- Intact Self-Healing: The topcoat remains healthy, allowing it to magically smooth out minor swirls and light scratches when exposed to a little heat.
- Hydrophobic Power: The surface continues to repel water and dirt, which actually makes future car washes even easier.
If you’re curious about the science behind this incredible material, you can learn more about paint protection film in our in-depth automotive guide.
Sticking to a safe and consistent cleaning regimen is the single best thing you can do to get the most out of your PPF. It protects your investment and keeps your car's paint underneath absolutely flawless for years to come.
To make it even simpler, here is a quick guide to what you should and shouldn't do when caring for your PPF.
Quick Guide to Safe PPF Cleaning
This table breaks down the essentials for keeping your automotive film in top-notch condition, ensuring you avoid common mistakes that can lead to costly damage.
| Action | Best Practice | Why It Matters |
|---|---|---|
| Washing | Use a pH-neutral car soap and a soft, clean wash mitt (like microfiber or lambswool). | Harsh detergents can strip the top coat, while gritty mitts can scratch the film. |
| Drying | Pat dry with a high-quality, plush microfiber towel or use a filtered air blower. | Dragging a low-quality towel can create micro-scratches. Air drying avoids all physical contact. |
| Spot Cleaning | Remove bird droppings, bug guts, and tree sap ASAP with a dedicated bug & tar remover. | These contaminants are acidic and can permanently etch the film's surface if left to bake in the sun. |
| Pressure Washing | Keep the nozzle at least 36 inches away from the surface and never spray directly at the edges. | High pressure can lift the edges of the film, causing it to peel and require replacement. |
Following these simple rules is the key to a long-lasting, great-looking paint protection film on your vehicle.
Consequences of Neglect and Improper Cleaning
What happens if you don't stay on top of it? Contaminants like bird droppings and bug splatter are incredibly acidic. If left to sit, they will eat into the film's surface, leaving behind permanent spots that even the best cleaning can't fix. Likewise, using a dirty sponge or an old bath towel to wash your car can grind dirt into the film, causing scratches that are too deep for the self-healing layer to fix.
Here in North Metro Atlanta, our cars deal with a ton of pollen, dust, and road grime. Regular, gentle washing is the only way to prevent this buildup from staining or discoloring your film over time. By mastering how to clean your paint protection film, you're taking control of your vehicle's appearance and protecting its value. This guide will walk you through the exact steps we use as professionals.
Building Your Essential PPF Cleaning Toolkit
When it comes to caring for your car's paint protection film, your cleaning technique is only half the battle. Having the right equipment on hand is just as critical. This isn't about grabbing any old sponge; it's about putting together a toolkit specifically designed to be gentle on your film's delicate top coat.
Using the wrong tools is a fast track to introducing micro-scratches or, even worse, chemically damaging the film. You could easily undo the very protection you invested in for your car. A proper kit ensures every wash actually enhances your PPF's clarity and lifespan, rather than slowly breaking it down.
Choosing Your Core Cleaning Agents
The foundation of any good PPF wash is the soap itself. This is one area where you absolutely cannot cut corners—quality truly matters.
pH-Neutral Car Soap: This is your non-negotiable starting point. Look for soaps with a pH level of 7.0 (neutral). Aggressive acidic or alkaline cleaners, like many all-purpose degreasers or even dish soap, will strip the hydrophobic top coat right off your PPF. This causes it to lose that slick, water-repelling quality and can even lead to yellowing over time.
Dedicated PPF Cleaner/Sealant: To give your automotive film an extra defensive boost, we recommend a spray sealant made specifically for PPF. These formulas are designed to crank up the gloss, enhance slickness, and add crucial UV protection. Unlike traditional carnauba waxes which can cause yellowing on film, these sealants are completely safe and make future car washes much easier by keeping dirt from sticking.
Selecting the Right Washing and Drying Tools
Most wash-induced damage happens from physical contact. That’s why your choice of wash mitts and drying towels is so important if you want to learn how to clean paint protection film without causing swirls and scratches on your vehicle.
A foam cannon is a fantastic addition to your washing arsenal. It hooks up to a pressure washer and blankets your car in a thick layer of suds for a touchless pre-wash. This initial foam bath lifts and loosens all the surface grit, letting you rinse most of it away before you ever touch the car with a mitt. This step alone dramatically cuts down the risk of creating swirl marks.
Once you’re ready for the hand-wash stage, here’s what you’ll need:
Microfiber Wash Mitts: Grab at least two high-quality, plush microfiber wash mitts. Their long, soft fibers are perfect for trapping dirt particles deep inside, pulling them away from the film’s surface instead of dragging them across it. Steer clear of old-school sponges—they’re notorious for trapping grit on their flat surface and grinding it right into your car's finish.
High-GSM Microfiber Drying Towels: GSM stands for "grams per square meter," and in the world of car detailing, a higher number means a plusher, more absorbent towel. You should be looking for towels with a GSM of 500 or higher. These can soak up a massive amount of water, which lets you pat the surface dry instead of wiping. That simple change from wiping to patting is a major way to prevent fine scratches.
For car owners dealing with our humid Georgia climate, especially in places like Canton or Holly Springs, mineral-heavy water spots can be a real headache.
The best defense against stubborn water spots is a high-quality, absorbent drying towel or even a filtered air blower. Drying your car's surface quickly and completely prevents those minerals from etching into your film as the water evaporates.
Putting together this specific toolkit gives you everything you need to perform a safe and effective wash every single time. Each item has a job to do, protecting your PPF from both chemical harm and physical abrasion. It’s this careful approach that makes the difference between just washing your car and truly maintaining your investment for the long haul.
Mastering the Two-Bucket Hand Wash Technique
If there's one technique every car owner with PPF should master, it's the two-bucket hand wash. This is the single most effective way to prevent the swirls and fine scratches that can dull your film’s finish over time. The whole point is to keep the clean, soapy water completely separate from the dirty rinse water, ensuring you never drag grit back across your vehicle's sensitive surface.
Before a wash mitt ever touches your car, though, you need to do a pre-rinse. Grab a pressure washer and stand back at least 36 inches from the paint. Using a wide, 40-degree fan tip, gently rinse off all the loose dust, pollen, and road grime. You're not trying to blast anything off here; you're just letting the water do the initial heavy lifting. This one step removes a huge chunk of abrasive dirt before you even start the real wash.
Setting Up Your Buckets
Now for the setup. You'll need two buckets. Fill one with your pH-neutral car soap and water—this is your "Wash" bucket. The second gets filled with just plain, clean water, becoming your "Rinse" bucket.
It’s a surprisingly simple system that makes a world of difference. In fact, using the two-bucket method can cut the risk of micro-scratches by up to 70% compared to just using a single bucket. By rinsing your mitt in the clean water bucket before getting more soap, you leave the dirt behind instead of putting it right back on your PPF. This is especially critical because while your film's topcoat can self-heal minor swirls, you don't want to constantly put it to the test. You can find more pro insights on how this automotive technique works over at OlsonsAutoDetailing.com.
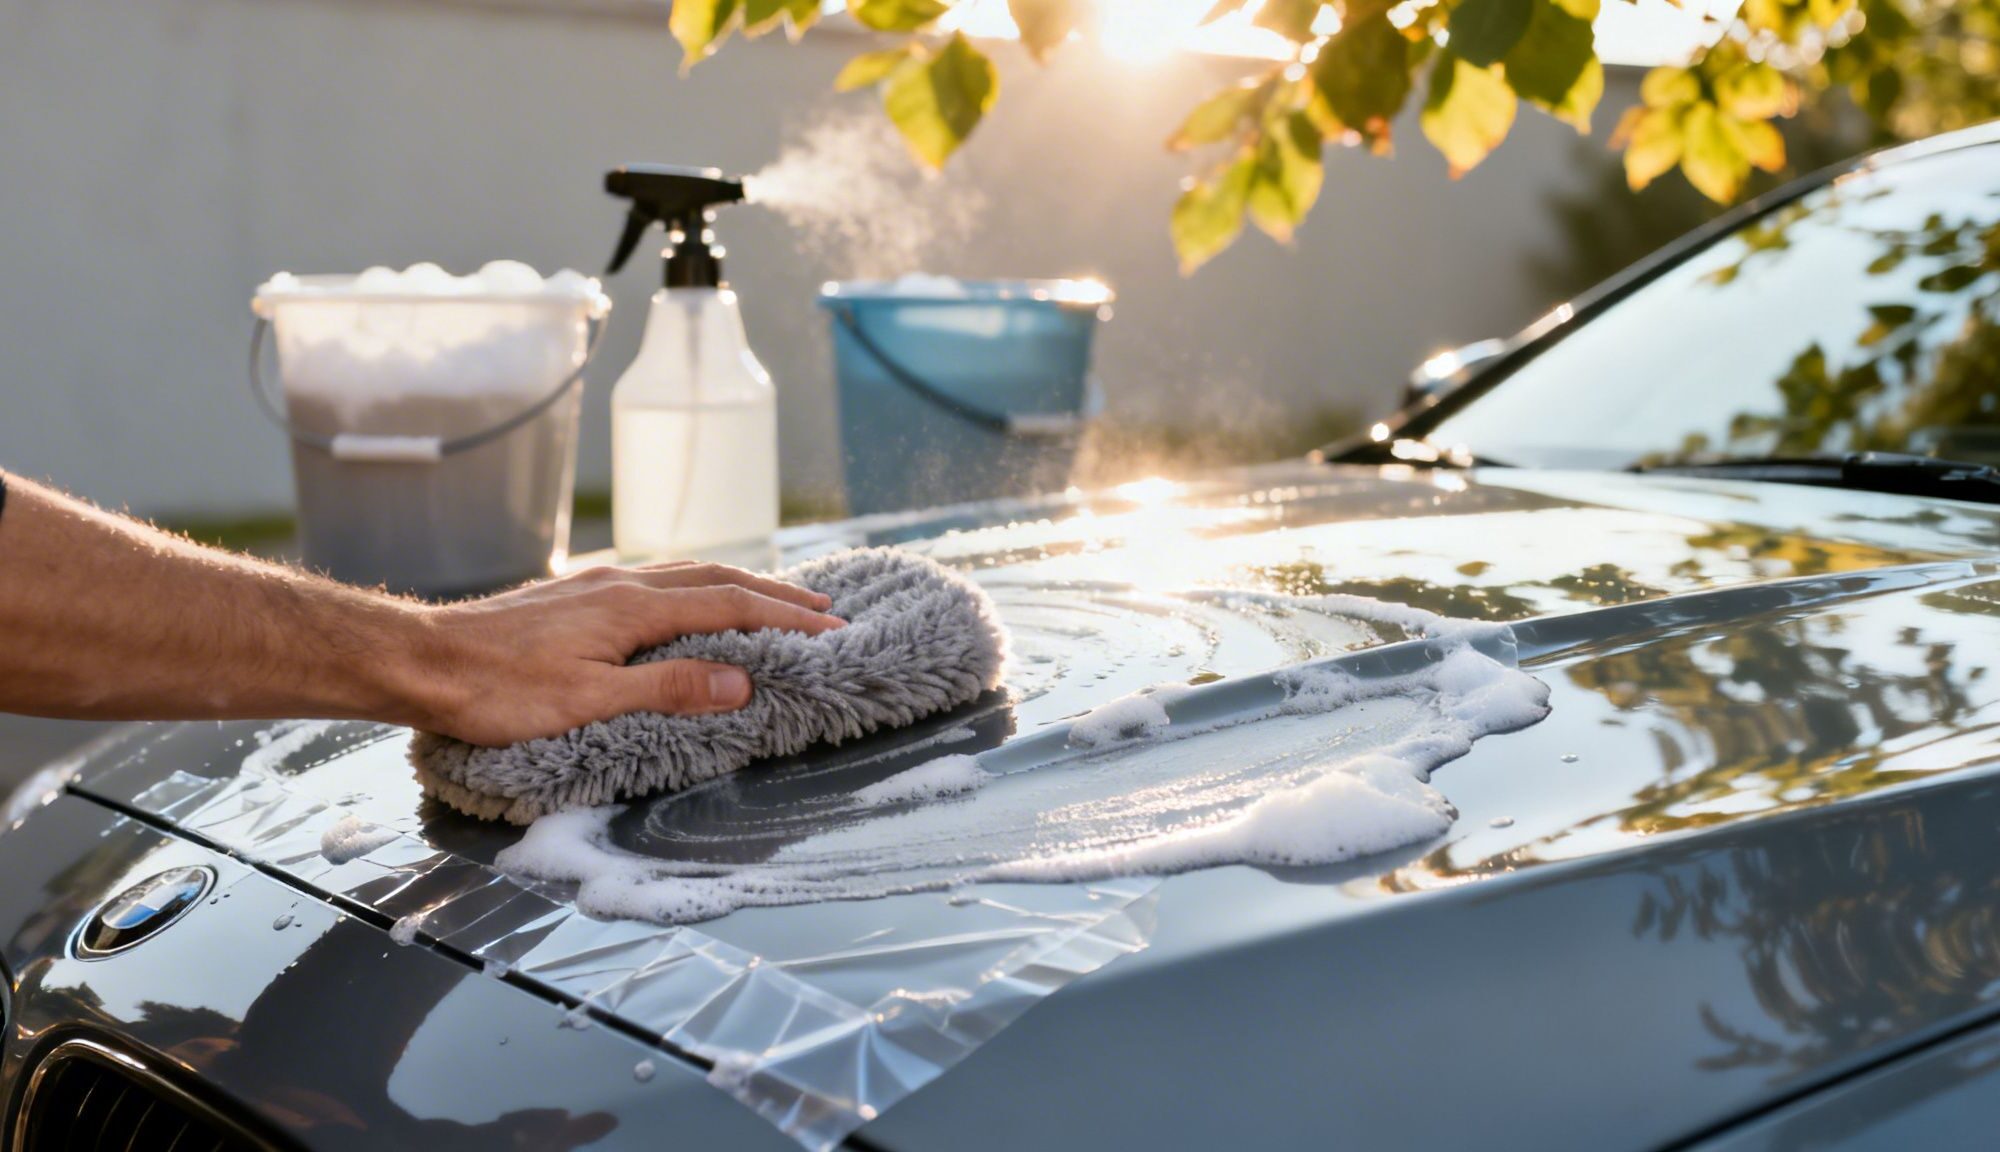
This diagram breaks down the essential tools you'll need for a safe and effective PPF cleaning process for your car.

It highlights the core components of a proper car wash: the right soap, a gentle wash mitt, and a soft drying towel—all pillars of the two-bucket method.
The Correct Washing Motion
With your buckets ready, it’s time to start washing. A cardinal rule is to always work from the top of the car down. Your roof, hood, and trunk are typically the cleanest areas, while the lower sides and bumpers collect the most road grime. This top-down approach keeps you from dragging the worst of the dirt up onto cleaner panels.
Here’s the rhythm you want to get into:
- Dunk your fresh microfiber wash mitt into the soapy "Wash" bucket.
- Gently wash a small section at a time—think half the hood or a single door panel.
- Always use straight, overlapping lines. Ditch the circular "wax-on, wax-off" motion. Straight lines are far less likely to create visible swirls if any light scratches happen.
- After that section, plunge the dirty mitt into the "Rinse" bucket and swish it around to release all the trapped grit.
- Give the mitt a wring before heading back to the "Wash" bucket for fresh soap, then move on to the next panel.
Repeat this cycle panel by panel until the whole car is clean. It’s a methodical process that guarantees you’re always working with a clean mitt and clean soap.
Pro Tip: Never wash your car in direct sunlight or when the panels are hot. Sun and heat will make soap and water evaporate almost instantly, leaving behind stubborn water spots and residue that can be a real pain to remove from your PPF. Stick to the shade or wash in the cool of the morning or evening.
Rinsing and Final Steps
Once you've washed every panel, it's time for the final rinse. Using your pressure washer from that same safe distance (or a gentle stream from a garden hose), rinse the car thoroughly from the top down. Be extra sure to flush out all the soap residue from panel gaps, trim pieces, and around emblems where it loves to hide.
This disciplined two-bucket method might feel a little tedious the first time, but it quickly becomes second nature. It's the same fundamental process we pros use to maintain flawless, high-end car finishes. It’s truly the best way to ensure your PPF stays looking as crystal clear as the day we installed it here at The Tint Guy.
How to Safely Remove Stubborn Contaminants

Even after a perfect hand wash, you'll inevitably find a few stubborn spots that just won't budge. Daily driving, especially around North Metro Atlanta, means your car is constantly under attack from bug splatter, bird droppings, tree sap, and road tar. If you let those sit and bake in the Georgia sun, their acidic nature can actually etch into the top layer of your paint protection film, causing permanent damage.
The absolute key is to deal with these messes quickly. The longer a contaminant sits on your film, the tougher it is to get off and the more likely it is to cause real harm. A standard wash often isn't enough for these caked-on spots, which is why having a spot-cleaning strategy is so important for your vehicle.
The Dwell and Lift Technique for Bugs and Tar
When you’re facing dried-on bug guts or sticky road tar, your first instinct might be to scrub hard. Don't do it. Aggressive scrubbing is the worst thing you can do, as it just grinds the gunk into the film and creates a web of micro-scratches. Instead, we use a simple method that lets the product do the work for you: "dwell and lift."
First, grab a dedicated, PPF-safe bug and tar remover. Stay away from all-purpose degreasers or harsh chemical solvents that can degrade the film's protective top coat. Spray the product right on the spot and just let it sit—or "dwell"—for the time recommended on the bottle, which is usually around 30-60 seconds.
This dwell time gives the cleaner a chance to work its magic, penetrating the contaminant and breaking its bond with the film. Once it has softened, you can simply "lift" the residue away with a clean, plush microfiber towel. You shouldn't have to scrub at all. A gentle wipe is all it should take to clear it away.
Tackling Mineral Deposits and Water Spots
Another common headache, especially with the local water in cities like Woodstock and Marietta, is water spots on cars. These are mineral deposits left behind when hard water evaporates off the surface. If you don't address them, these minerals can etch into the PPF, leaving behind faint but permanent circles.
- For Fresh Spots: If you see them right after a wash, a quick detailer spray and a fresh microfiber towel will usually do the trick. The lubrication helps lift the minerals before they have a chance to bond.
- For Stubborn Spots: If the spots have been sitting for a day or two, you’ll need a dedicated water spot remover that’s formulated to be safe for PPF. These products use a very mild acid to dissolve the minerals without damaging the film. Just apply to a cool car panel, let it work for a moment, and gently wipe it away.
Never let water spots sit on your film, especially on dark-colored cars where they show up the most. Getting them off quickly is the only surefire way to prevent permanent etching and keep your PPF looking crystal clear.
Some of the more advanced paint protection films have excellent chemical resistance and even self-healing paint protection film options that make them more resistant to this kind of damage. This technology can be a real game-changer for maintaining a flawless finish on your car.
By tackling these stubborn contaminants right away and with the right products, you’ll preserve the integrity and look of your PPF. This targeted approach is a small effort that goes a long way in protecting your automotive investment for years.
Drying and Sealing for Long-Term Protection
A great hand wash is the perfect start to caring for your car's PPF, but the job isn’t quite done once you’ve rinsed off the soap. What you do after the wash is what truly locks in that flawless finish. The drying and sealing steps are critical for protecting the film from the elements and making your next wash a whole lot easier.
One of the quickest ways to ruin a perfect wash is by drying improperly. Just letting your car air dry, especially around here with our hard water, is asking for stubborn mineral spots that can actually etch the film's surface over time. A gentle, proactive drying method is a must to keep that crystal-clear shine.
Touch vs. Touchless Drying: Which Is Best for PPF?
When it comes to drying your PPF-wrapped vehicle, you’ve got two excellent, safe choices. Honestly, it often just boils down to your personal preference and the tools you have on hand.
The first method is using a plush, high-quality microfiber drying towel. The key is to find one with high absorbency (a GSM of 500 or more) and to use a “pat dry” motion. Simply lay the towel over a panel, gently pat it to soak up the water, then lift and move to the next area. You want to avoid dragging or wiping, which can still create those tiny micro-scratches you're trying to prevent.
The second option, and what many pros consider the safest, is a filtered air blower. This gives you a truly touchless dry. These blowers use powerful jets of warm, filtered air to push water out of every nook and cranny—think panel gaps, mirror housings, and emblems where water loves to hide and cause drip marks later. A touchless dry completely takes away the risk of introducing any new swirls or scratches to your car's finish.
Expert Insight: Whichever way you go, work quickly but don't rush. The goal is simple: get all the standing water off your car before the sun or air has a chance to evaporate it, leaving those pesky mineral deposits behind on your film.
The Critical Role of PPF-Specific Sealants
Once your car is perfectly dry, it’s time to add a fresh layer of protection with a dedicated sealant. It's crucial to understand that traditional carnauba waxes are a no-go for paint protection film. They can lead to yellowing over time and create an unsightly buildup along the film's edges.
Instead, you need to grab a synthetic sealant or a ceramic-based spray that’s specifically made to be safe for PPF on your vehicle. These products create a slick, sacrificial barrier over your film and deliver some serious benefits:
- Enhanced Hydrophobic Properties: They make the surface so slick that water just beads up and rolls right off.
- Boosted Gloss and Clarity: A good sealant really deepens the shine of your PPF, giving it that "wet" look.
- UV Protection: This adds another layer of defense against the sun's harsh rays, helping prevent the film from aging prematurely.
- Easier Cleaning: Dirt and grime have a much harder time sticking to a slick surface, which makes your next car wash significantly faster.
Choosing the right product is everything. A durability study showed that over 90% of PPF damage is caused by using products that aren't pH-neutral. Paint protection film, which is a urethane layer typically 6-8 mils thick, needs a neutral pH 7.0 environment to keep its topcoat healthy. The acidic rain we often see in Cobb and Cherokee Counties can degrade the film, and using harsh chemicals only makes it worse. For more on this, you can explore these professional PPF care tips.
Also, remember to avoid washing your vehicle completely for the first 7-14 days right after installation. This gives the film’s adhesive the time it needs to fully cure.
Applying a sealant is usually a breeze. Just spray a light mist onto one panel at a time, gently spread it with a clean microfiber towel, and then use a second, dry towel to buff off any excess. Doing this every 3-6 months is one of the most effective things you can do to maximize your paint protection film's lifespan and keep your vehicle looking brand new.
Common Questions About PPF Care
Even with the perfect game plan for cleaning, some questions always pop up. Paint protection film is a pretty specialized automotive product, and we get it—figuring out the specifics can feel like a lot. As the go-to installers for car lovers in Woodstock and Acworth, we’ve heard just about every question in the book.
Think of this as your quick-reference guide for those "what if" moments. We’ve put together some clear, no-nonsense answers to the queries we hear most often at The Tint Guy.
Can I Take My Car with PPF Through an Automatic Car Wash?
This is a big one we get all the time, and our answer is always a firm 'no.' While the convenience is tempting, automated car washes, especially the ones with those big spinning brushes, are just way too aggressive for paint protection film. Their stiff bristles can easily create micro-scratches that will dull your film’s finish over time.
Even worse, the high-pressure water jets they use can target the film’s edges, forcing water underneath and causing it to lift or peel.
Touchless car washes might seem like a safer alternative, but they have their own problems. Many rely on harsh, high-alkaline chemicals that are not pH-neutral. With repeated exposure, these strong detergents can start to break down the protective top coat on your PPF, killing its hydrophobic properties and shortening its lifespan.
For the best results and to truly protect your automotive investment, a proper two-bucket hand wash is always the safest and most effective method. It gives you complete control over the process and ensures only gentle, film-safe products touch your vehicle's surface.
How Soon Can I Wash My Car After PPF Is Installed?
You need to wait at least 7 days before giving your car its first wash after we install new PPF. This initial waiting period is absolutely critical. It gives the film’s pressure-sensitive adhesive the time it needs to fully cure and create a permanent bond with your car’s paint.
Washing the car too soon is a huge risk. Moisture can easily creep under the film's edges before they are fully sealed, leading to bubbles, lifting, and a failed installation. Just give it that one full week to set properly. After that, you’re clear to start your regular, safe hand-washing routine.
What Should I Do If My PPF Gets a Small Scratch?
First off, don't panic. One of the most amazing features of modern, high-quality paint protection films—like the ones we install here at The Tint Guy—is their self-healing top coat. Most minor swirls and light scratches on your car will literally disappear on their own when they're exposed to a little heat.
Often, all you have to do is park your car in the sun on a warm day. The warmth from the sun is usually enough to activate the self-healing properties, allowing the film's top layer to flow back together and smooth itself out. You can also carefully use a heat gun on its lowest setting, holding it a safe distance from the surface to gently speed up the process.
If you find a scratch that’s deep enough to catch your fingernail, it's time to bring your car in. It’s always best to let a professional installer assess the damage. We can figure out if a simple repair is possible or if a panel replacement is needed without risking any harm to the film or the paint underneath.
Do I Need to Wax or Seal My Paint Protection Film?
You should absolutely avoid using traditional carnauba waxes on your PPF. It’s a common mistake. These waxes often contain solvents or petroleum distillates that can absorb into the film, causing it to yellow over time. They can also create an ugly, waxy buildup right along the film’s edges.
However, applying a synthetic sealant or a ceramic coating specifically designed for PPF is a fantastic idea and something we highly recommend. These products add an essential layer of UV protection, give the film a huge gloss boost, and make the car's surface incredibly slick and hydrophobic. That slickness means dirt and grime have a much harder time sticking, making your car easier to clean. For best results, we suggest applying a PPF-safe sealant every 3-6 months.
Protecting your vehicle is what we do best at The Tint Guy. Whether you have more questions about PPF care or you're ready to shield your car with our expert automotive tinting and paint protection film services in Woodstock or Acworth, GA, our team is here to help. Schedule your consultation today to keep your car looking brand new.