Taking off old Paint Protection Film (PPF) is one of those jobs that demands more patience than muscle. The goal is to gently persuade the film and its adhesive to let go, not to rip it off in a hurry. A slow and steady approach is the only way to ensure you don't damage the paint you were trying to protect in the first place.
Recognizing When Your PPF Needs to Be Removed
Paint Protection Film is a fantastic shield for your car's finish, but like all good things, it doesn't last forever. Before you even think about the how of removing old PPF, you need to understand the why. Ignoring the warning signs won't just make your car look tired; it can trap moisture and dirt against the paint, leading to bigger headaches down the road.

We've seen PPF explode in popularity for all types of vehicles, from cars and trucks to SUVs. Back in 2017, the global market was valued at around USD 537.4 million, and it's on track to nearly double. But this also means many of those early installations are now hitting their expiration date. In our experience as automotive protection specialists, a significant chunk of older film—roughly 25-30%—is now failing, mostly due to years of UV abuse.
Telltale Signs of a Failing Film
So, how do you know your PPF is past its prime? Keep an eye out for these classic symptoms. Catching them early can be the difference between a simple weekend project and a major ordeal.
- Yellowing or Discoloration: This is the most obvious sign. UV rays break down the film’s top layers, turning what was once a crystal-clear barrier into a dull, yellowish haze that ages your car's appearance.
- Cracking and Brittleness: You might notice tiny, spiderweb-like cracks spreading across the surface. This means the film has lost its flexibility. If you try to remove it in this state, it will likely shatter into a thousand frustrating little pieces.
- Bubbling or Blistering: These are pockets of air or water trapped between the film and your paint. They're not just ugly; they create spots where moisture can sit and potentially start corrosion.
- Peeling Edges: When the film's edges start to lift, they become magnets for dirt and grime. This creates a dark, noticeable outline and is usually the first sign that the adhesive is giving up.
Many people think PPF is a "set it and forget it" product for their vehicle. The truth is, it has a finite lifespan. Knowing when that lifespan is over and taking action is just part of responsible car ownership.
Why Proactive Removal Is Crucial
Putting off the removal of a failing PPF can turn a manageable job into a costly one. As the film and its adhesive bake in the sun year after year, they bond more stubbornly to your car’s clear coat. An extremely brittle film can be a nightmare to get off, dramatically increasing the labor time and the risk of scratching the paint underneath.
Don't forget about your vehicle's resale value, either. A car with yellowed, peeling PPF looks neglected. On the other hand, a car with pristine paint—even an older one—screams "well-cared-for." Removing that degraded film is a smart move that preserves your car's value and curb appeal. If you're curious about what to expect from a quality installation, check out our guide on how long PPF should last.
Gathering Your Tools and Setting Up for Success
Getting old paint protection film off your car takes more than just a bit of elbow grease. The right tools and a safe, prepped workspace are what separate a clean removal from a costly mistake. Think of it like a minor surgery for your car—you need to have everything laid out and be ready for the job before you make the first cut.
The whole point is to gently persuade the film to come off, not to rip it off in a brute-force battle. That’s why your choice of tools is so important. While you might be tempted to grab a heat gun, we’ve found a garment steamer is the far better choice. A steamer gives you moist, even heat that’s much more forgiving on your car’s clear coat. A heat gun, on the other hand, puts out intense, dry heat that can easily blister your paint if you’re not extremely careful.
Your Essential Tool and Safety Checklist
Before you even think about touching the film, get all your supplies in one place. Having everything organized and within arm's reach makes the entire process smoother and a whole lot less frustrating.
- Garment Steamer: This will be your workhorse. It’s the best way to gently heat the film and soften that stubborn adhesive underneath.
- Plastic Razor Blades: Absolutely essential for lifting the film’s edge without scratching your paint. Never, ever use metal blades on your car’s finish.
- Dedicated Adhesive Remover: Go for a quality, citrus-based product designed for automotive paint. Stay away from generic, aggressive solvents that can damage the clear coat.
- Microfiber Towels: You can’t have too many. You'll need a stack of them for cleaning, drying, and wiping away all that sticky residue.
- Heat-Resistant Gloves: A steamer is still plenty hot. Protect your hands and avoid a nasty burn.
- Safety Glasses: A must-have to protect your eyes from hot steam and any splashes from the adhesive remover.
One of the most common mistakes we see is people reaching for a powerful heat gun, thinking more heat means a faster job. In our experience as professional automotive installers, a good steamer gives you so much more control and drastically lowers the risk of overheating a panel—a mistake that can permanently ruin your clear coat.
Creating a Safe and Effective Work Environment
Where you work is just as critical as the tools you use. Trying to do this outside on a hot, sunny day is a recipe for disaster; the film can get extra sticky or even brittle. A dark garage is just as bad, making it easy to miss spots or accidentally scratch the paint. A controlled environment is your best friend here.
Find a spot that is clean, well-lit, and well-ventilated—a garage with the door open is perfect. You're working with steam and chemical removers, so good airflow is non-negotiable. Make sure your space is clear of clutter to avoid tripping and to give yourself plenty of room to move around the car.
It’s also smart to have a fire extinguisher handy as a basic safety precaution whenever you’re using a heat-producing tool.
Before you start pulling, take a minute to understand the material you’re up against. If you're curious about the different types of films and how they're made, you can read more about paint protection film. Knowing a bit about its construction will give you a better feel for how it should react to the heat and what to expect as you work.
Finally, the most important first step: wash your car. Give it a thorough cleaning to get rid of any loose dirt or grit. This prevents you from grinding that debris right into your paint while you’re removing the film. Once your tools are ready and your car and workspace are prepped, you’re ready to get started.
The Art of Removing Old and Brittle PPF
This is where your patience becomes the most valuable tool in your garage. When you're dealing with old, brittle paint protection film, it's a game of finesse, not force. We'll walk you through the entire process, from prepping your car to that final satisfying pull, so you can sidestep the common mistakes that can lead to costly paint damage.
First things first, you have to prep the surface. A thorough car wash isn't just a suggestion; it's non-negotiable. Any dirt or grit left behind can get ground into your paint as you work, causing the very scratches you're trying to prevent in the first place. Think of it like a surgeon scrubbing in before an operation—a clean field is absolutely essential for a good result.
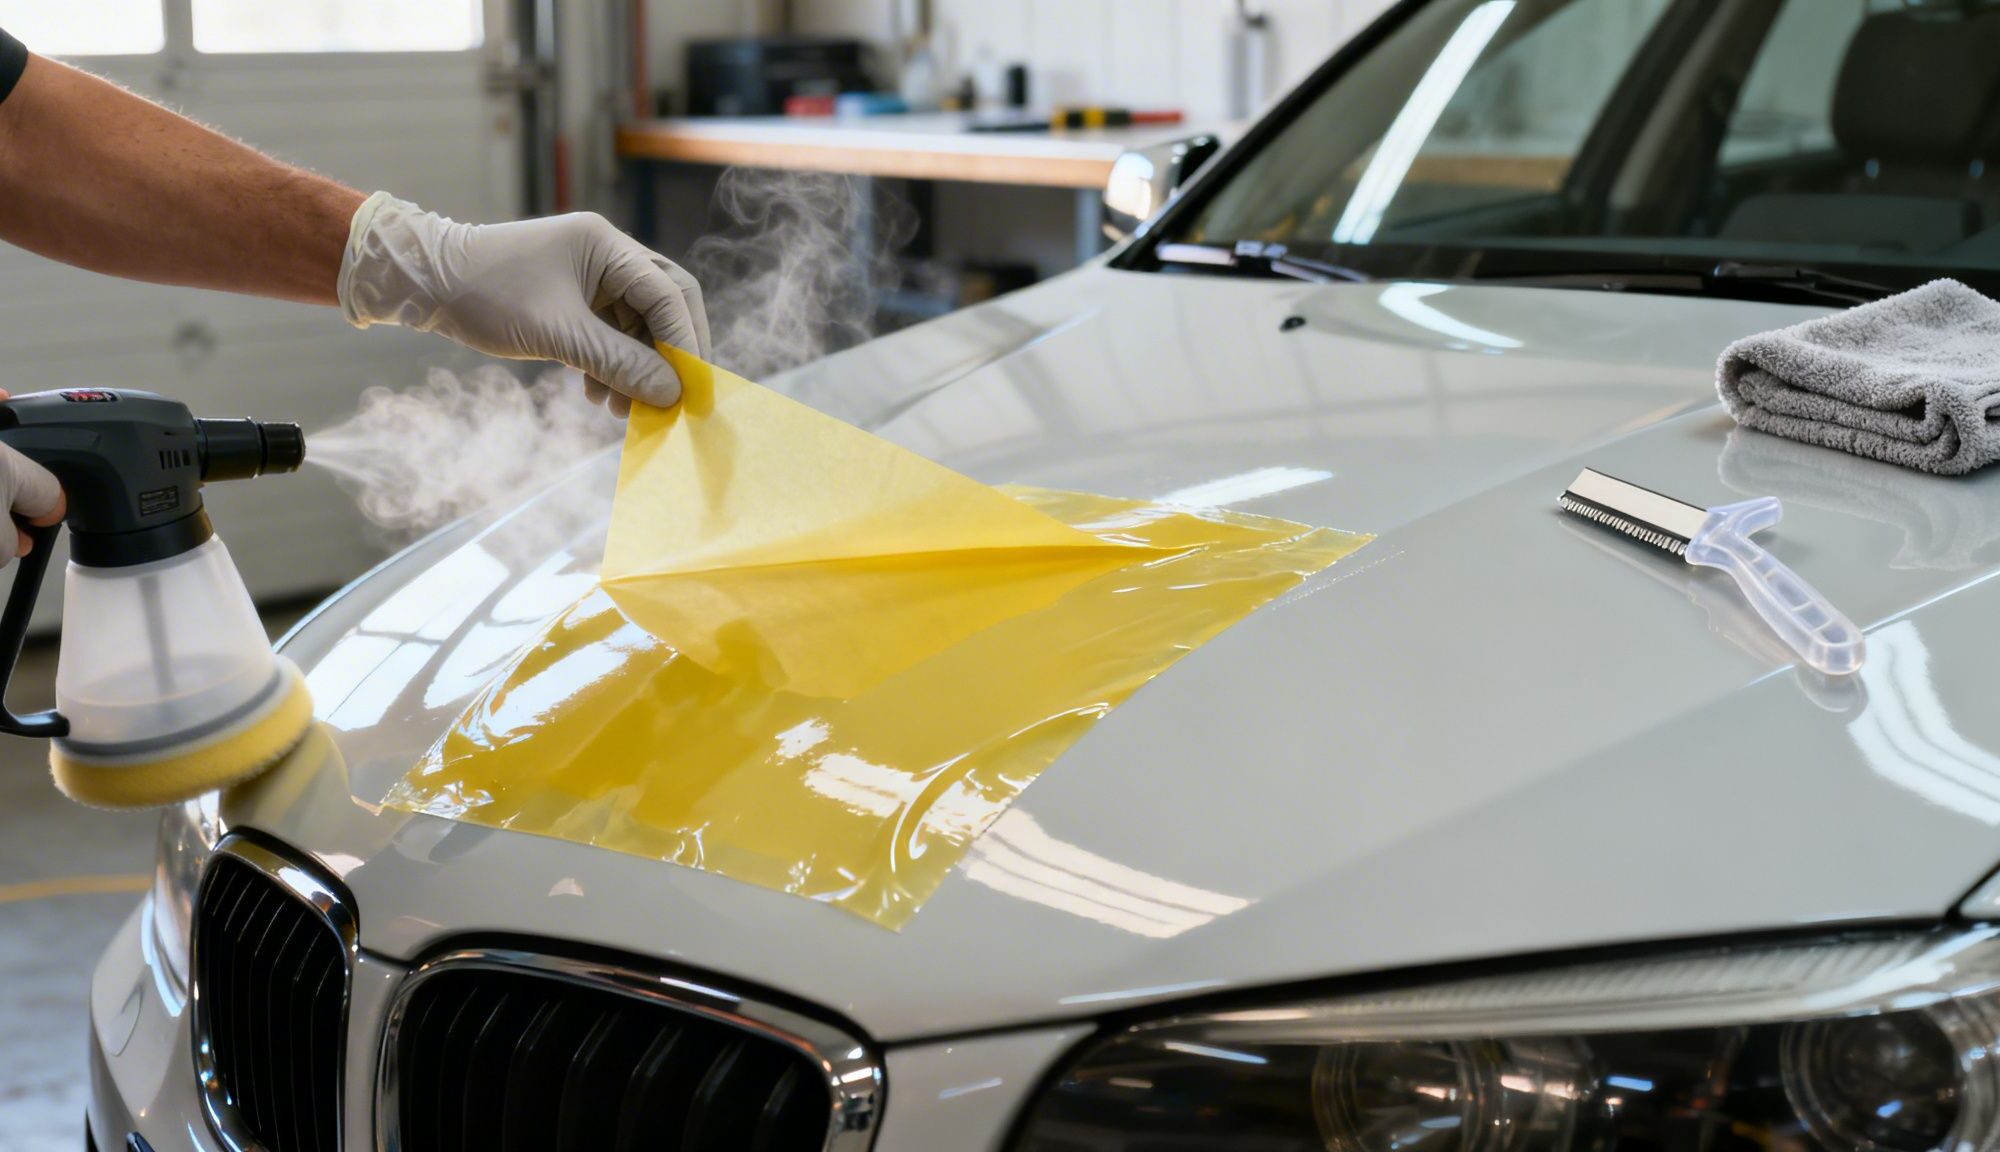
The image below lays out the must-have tools for a safe and successful PPF removal.

This shows the core setup: a steamer for gentle heat, gloves to protect your hands, and a plastic scraper for lifting edges without marring the paint.
Mastering the Removal Technique
The real secret to peeling old PPF is a combination of heat, angle, and speed. Your goal is to apply just enough warmth to soften both the film and the adhesive underneath, making it pliable enough to peel away cleanly. We strongly recommend using a garment steamer instead of a heat gun. A steamer provides a gentler, moist heat that spreads out, dramatically lowering the risk of burning or damaging your car's clear coat.
Work in small, manageable sections, about two-by-two feet at a time. Keep the steamer moving a few inches from the surface, heating the area evenly until the film feels soft and a bit rubbery. Once it's ready, use a plastic razor blade or even your fingernail to carefully lift a corner. Whatever you do, never use a metal blade. It's almost guaranteed to gouge your paint.
With an edge lifted and a good grip, it's time to start the pull. This is where the "low and slow" method is critical.
The biggest mistake DIYers make is pulling the film straight up or yanking it quickly. You must pull the film back on itself at a low angle, almost parallel to the panel. A slow, steady pull gives the adhesive time to release cleanly from the paint.
This technique is especially vital on curved areas like bumpers or side mirrors, where the film is under more tension. If you get impatient and rush it, the film is far more likely to tear into frustrating little pieces.
Handling Film That Tears or Shatters
Unfortunately, with really old and sun-baked PPF, some tearing is almost unavoidable. The film loses its elasticity over the years and can break apart. If this starts happening, don't panic or start scraping aggressively.
Just stop, reheat that small section where it tore, find a new edge, and start pulling again. Yes, it’s tedious. But patience is the only way you'll get the job done without damaging your car.
The demand for perfect automotive paint has sent the PPF market soaring, with projections showing it will hit USD 726.63 million by 2030. The downside is we're now dealing with a wave of failing films from installations done 8-12 years ago. Industry data shows 35% of these older films degrade from oxidation, turning into a brittle, cracked mess. This is where things get risky; improper removal attempts using metal blades can scratch the paint in 50% of DIY attempts, which can slash a vehicle's resale value by 12%. You can dig into these trends in studies from Grand View Research.
Real-World Removal Scenarios
Removing film from a big, flat car hood is a completely different experience than working on a complex, curvy bumper.
- For Flat Panels (Hoods, Roofs): These are usually the easiest parts of a car. You can work in larger sections and maintain a steady, consistent pulling angle. The key is to keep your pulling hand low and apply smooth, even tension.
- For Curved Panels (Bumpers, Mirrors): These spots demand more finesse. You'll need to work in much smaller sections and constantly adjust your pulling angle to follow the panel's contour. Expect the film to tear more often here—just stay patient and stick with the heat-and-pull process.
Ultimately, the condition of the film itself will dictate how your day goes. A well-maintained, high-quality film will often come off in large, satisfying sheets. A cheap or severely degraded film, on the other hand, will fight you every single inch of the way. By following these steps and keeping your cool, you can successfully get that old PPF off and bring that pristine paint back to life.
You’ve wrestled the old, tired film off your car, and that’s a huge win. But don't pop the champagne just yet. Now you’re facing what’s often the most tedious part of the job: the sticky, stubborn adhesive residue left behind.
Getting this stage right is the difference between a perfectly clean surface and a smudged-up mess that can actually damage your clear coat. This is a game of chemical patience, not brute force.

Pulling the film is only half the battle. Your real mission now is to safely dissolve and wipe away all that gunk without scratching the very paint you just worked so hard to free.
Choosing Your Weapon: The Right Adhesive Remover
Not all adhesive removers are built the same, and your choice here is critical. Using a chemical that’s too harsh can be just as bad as taking a scraper to your paint. You'll generally find two types on the shelf: citrus-based and solvent-based.
Your first line of attack should always be a high-quality, citrus-based remover. These products use natural solvents from citrus fruits, making them much gentler on your car's clear coat. They are surprisingly effective at breaking down the specific adhesives used for PPF.
Solvent-based removers might work faster, but they come with a much higher risk. If you leave them on for too long or use them improperly, they can soften or even strip your paint. We always, always start with the least aggressive method first.
The Safe Removal Process
Grab a quality citrus-based remover and a big stack of clean microfiber towels. The whole process boils down to saturating the area, letting the product work, and gently wiping—not scrubbing.
- Apply Liberally: Spray a generous amount of the remover directly onto the adhesive. Don't be stingy; you need to completely saturate the residue.
- Let It Dwell: This is where the magic happens. Give the remover several minutes to sit, just as the product instructions recommend. You’ll start to see the adhesive soften and almost turn into a gel.
- Wipe, Don't Scrub: Take a fresh microfiber towel and gently wipe the softened gunk away. Try to use a rolling or lifting motion instead of aggressive back-and-forth scrubbing. Once a towel gets loaded with residue, grab a clean one. If you don't, you're just spreading the mess around.
The secret to a scratch-free finish is simple: let the chemical do the heavy lifting. If you feel like you have to scrub hard, the adhesive isn't ready. Spray it again and give it more time.
Final Prep for a Flawless Finish
With the adhesive gone, your paint is now totally exposed for the first time in years. It might look clean, but trust us, there are microscopic contaminants bonded to the surface. Prepping the paint properly now creates the perfect canvas for whatever’s next, whether that's new PPF, a ceramic coating, or just a good coat of wax.
Decontaminate with a Clay Bar
This is non-negotiable. A clay bar treatment glides over the paint and gently pulls out any leftover specs of adhesive, road grime, and industrial fallout that a normal wash just can't touch. You’ll know you’re done when the paint feels perfectly smooth and slick. This step ensures you aren’t sealing dirt under your new layer of protection.
Polish to Perfection
After claying, a light polish can take the finish to the next level. We’re not talking about heavy-duty paint correction here. The goal is simply to restore maximum gloss and clarity to the clear coat. A fine-cut polish will buff out any light marring from the removal process and bring out that deep, wet-looking shine.
Once you’ve done this, your vehicle’s paint is not only clean but truly restored. It's now perfectly prepped and ready for a new layer of high-quality paint protection to keep it looking great for years to come.
Knowing When to Call a Professional Detailer
Look, we get it. There's a certain satisfaction in a DIY project done right. But when it to removing old paint protection film from your car, you have to know when to wave the white flag. What starts as a weekend task can quickly turn into a high-stakes gamble with your car's paint job.
Recognizing the red flags isn't about admitting defeat. It's about making a smart, strategic call to protect your investment. Sometimes, putting the tools down is the best move you can make.
Signs It's Time for an Expert
If you run into any of these situations, our professional advice is to stop immediately. Pushing forward is a recipe for expensive damage that a pro has the right tools and experience to avoid.
- The Shatter Effect: Instead of peeling in sheets, the film is cracking and shattering into thousands of brittle little shards. This is a tell-tale sign of a severely degraded film that requires specialized techniques to get off without countless hours and deep scratches.
- Working on Repainted Surfaces: If you know or even suspect your car has been repainted, the risk of the film pulling that new paint right off is incredibly high. A professional can assess the bond and use specific methods to minimize that danger.
- Old, Sun-Baked Film: On older cars that have spent years under the sun, the adhesive can bond to the clear coat in unpredictable ways. An expert can "read" the film's condition and adjust their approach accordingly, something that only comes with experience.
The Professional Advantage
Calling in a professional automotive detailer isn't just about speed; it's about safety and precision. We use commercial-grade steamers that deliver consistent, moist heat, along with infrared lamps that soften adhesive evenly across an entire panel. This level of control is something a heat gun just can't match.
The PPF market is booming—it's projected to hit USD 838.1 million by 2032. With over 5 million cars getting film installed each year, pros are removing old, failing film more than ever. Up to 20% of those installations need replacement by their eighth year.
The data doesn't lie: DIY heat gun misuse above 250°F is linked to warped paint in 45% of cases. In contrast, professionals using the right tools and citrus-based removers have a 99% success rate with zero damage. You can dig into more market data from Persistence Market Research.
Calling a professional isn't about a lack of skill. It's about recognizing that the potential cost of a mistake—like a clear coat repair that can easily top $1,500—far outweighs the cost of professional removal.
A Realistic Cost-Benefit Analysis
A professional PPF removal will typically run you between $500 and $800, depending on your vehicle's size and how bad the film is. That might sound like a lot, but let's put it in perspective.
The cost to repair the clear coat on a single damaged panel can easily exceed $1,000. If you slip up and damage a few panels, you could be looking at a repair bill five or six times what a pro would have charged in the first place.
While some jobs are perfect for the DIY enthusiast, it's crucial to know your limits. Understanding other essential maintenance tips can also help you decide when to tackle a job yourself versus calling for backup. The decision to hire a pro is a calculated move that protects your car's value and condition.
If you're still on the fence, learning more about the pros and cons of paint protection film might offer some clarity. Ultimately, a professional's fee is buying you peace of mind and a guaranteed perfect finish—a worthwhile investment for any car owner who values their ride.
Common Questions About Removing Old PPF
Even after walking through the steps, you probably still have a few questions rolling around in your head. It’s a job with a lot of variables, and being prepared is smart. We hear these questions all the time from car owners, so let's clear them up so you can move forward with confidence.
Can I Use a Hairdryer Instead of a Heat Gun or Steamer?
We get this one a lot. While a household hairdryer certainly produces heat, it’s just not the right tool for this particular job. It simply can't generate the consistent temperature or focused airflow you get from a dedicated heat gun or, our top choice, a garment steamer.
Trying to use a hairdryer will make the removal process painfully slow. More importantly, the inconsistent heat makes the film far more likely to tear into tiny, frustrating pieces. For the safest and most efficient removal, a steamer is the hands-down winner for pros and DIYers alike.
Will Removing the PPF Damage My Car's Original Paint?
This is the number one concern for most car owners, and it's a completely valid one. Here’s the good news: if the PPF was applied to your car's original factory paint and you follow the right process, the risk of damage is extremely low. The whole point of quality film is that it can be removed safely.
However, a few things can definitely increase the risk:
- Poor-Quality Repaints: If a panel was repainted on the cheap or the paint wasn't cured properly before the film went on, the paint is very likely to come off with the PPF.
- Extremely Brittle Film: Film that’s been baking in the sun for a decade or more can become so degraded that it bonds aggressively to the clear coat, making for a much tougher removal.
- Improper Technique: Rushing the job by pulling too fast, yanking at a high angle, or blasting it with too much heat is a recipe for trouble.
If you have any doubts about your car's paint history, hitting pause and consulting a professional is always the safest move.
What Should I Do Immediately After the Film Is Removed?
Once the old film and adhesive are gone, your car's paint is perfectly clean but also totally exposed. This is a critical moment to lock in its health and appearance for the long haul.
Your first move should be a light paint decontamination with a clay bar to pull out any gunk that was trapped under the film. After that, a light polish will restore that deep gloss and take care of any minor imperfections. At this point, you have a pristine surface to work with.
After successfully removing your old PPF, you're probably thinking about what kind of new protection to apply. To explore all your options, from fresh PPF to other solutions, check out A Complete Guide to Car Paint Protection Products. This is the perfect time to lay down a new layer of high-quality PPF, a durable ceramic coating, or at the very least, a quality paint sealant to shield that freshly exposed finish.
If you've decided the DIY route isn't for you, or if you want to ensure your vehicle gets the best protection available after removal, trust the experts. At The Tin Guy, we specialize in professional paint protection film and automotive window tinting services in Woodstock and Acworth, GA.