You walk out to the car, catch the front edge of the hood in the light, and there it is. The film that used to disappear into the paint now looks tired. Maybe the corners are lifting. Maybe the surface has gone cloudy. Maybe the bumper has a line of dirt trapped at the edge that won't clean out no matter how careful you are.
That's usually the point when owners in Woodstock, Kennesaw, and Canton start asking the same question. Can this stuff come off cleanly, or am I about to make a mess of my paint?
The honest answer is that paint protection film removal can be straightforward, or it can turn into a slow, adhesive-heavy fight. The difference is rarely luck. It usually comes down to the age of the film, how it has weathered, what's underneath it, and whether the person removing it knows when to stop pushing.
Is It Time to Remove Your Car's Paint Protection Film
A lot of drivers notice the change gradually. The hood still looks decent from ten feet away, but up close the film has started to tell on itself. Edges collect grime. The top layer doesn't look as clear as it used to. A mirror cap starts peeling before the rest of the car, and suddenly the whole install looks older than the vehicle.
That usually means removal is no longer just about appearance. It's maintenance.
Professionally installed PPF is widely described as lasting about 5 to 10 years before replacement or removal becomes necessary, according to guidance on PPF lifespan and removal timing. The important part isn't just the lifespan itself. It's that the adhesive is designed to release more cleanly when the film comes off within that intended window.
If you leave aging film on too long, the job changes. What could have been a controlled peel becomes brittle tearing, stubborn adhesive, and a lot more cleanup. That's why it helps to understand how long paint protection film lasts before you decide whether to remove, replace, or keep stretching the life of an install that's already on borrowed time.
Paint protection film isn't supposed to stay on the car forever. On aging installs, timely removal protects the finish better than waiting until the film starts failing badly.
The biggest mistake I see from DIY-minded owners is treating old PPF like a vinyl sticker. It isn't. Good film was built to hold on through weather, washing, heat, and road abuse. When it starts to fail, it often fails unevenly. One panel may peel easily while the panel next to it fights back hard.
That's why the right first move isn't grabbing a heat gun. It's figuring out what kind of removal job you have.
How to Assess Your PPF and Paint Condition
Before you touch a corner of the film, inspect it like a technician would. The condition of the film tells you a lot about how the removal will go. Most DIY content skips this and jumps straight to peeling. That's backwards.
Aging film doesn't all fail the same way. Some older installs are still flexible and come off with patience. Others crack, shear, and leave adhesive everywhere. That gap matters because, as noted in guidance on aged and failure-prone PPF, removal difficulty is strongly tied to film age and degradation, yet most consumer advice doesn't explain when a normal removal turns into a restoration job.

What the film is telling you
Start with the obvious visual signs. Walk around the car in direct light and then again in shade.
- Yellowing or haze: This usually means the film has aged enough that removal should be on your radar.
- Lifted edges: Dirt gets under the edge, moisture gets involved, and the bond becomes inconsistent.
- Cracks or a dry, brittle feel: That's a warning sign. Brittle film tends to tear instead of peel.
- Bubbling across multiple areas: Widespread bubbles often mean the install is past the easy-removal stage.
- Heavy contamination trapped under the film: That can complicate cleanup and increase the chance of dragging debris across the paint.
If the film still feels flexible and the issues are limited to mild edge lift or cosmetic aging, DIY may still be realistic. If it feels stiff or breaks into small pieces when you test a tiny hidden edge, slow down.
Check the paint, not just the film
Many owners find this surprising. The film may not be the only variable. The paint underneath matters just as much.
Look closely for these red flags:
- Previous repaint work: Mismatched texture, tape lines, or color variation can mean a panel has been resprayed.
- Thin or damaged clear coat at edges: If the clear is already compromised, removal risk goes up.
- Stone chip repairs or touch-up blobs under the film: These areas may not behave like factory paint.
- Existing scratches along film edges: They can catch a towel or tool during removal.
Practical rule: If you suspect a repainted panel, treat the whole job as higher risk even if the film itself looks manageable.
A clean surface also helps you read the install correctly. If the car is dirty, wash it first so you're not confusing grime with staining or edge failure. This is also a good time to review how to clean paint protection film properly so you can separate normal contamination from actual film breakdown.
Quick risk check before you commit
A simple way to judge the job is to sort it into one of two buckets.
| Condition | What it usually means |
|---|---|
| Film is flexible, mostly intact, with minor edge lift | Removal may be feasible with careful DIY technique |
| Film is cracked, brittle, heavily discolored, or tearing during a test pull | The job is moving toward pro territory |
If you can't confidently tell which bucket your car belongs in, that's the answer. Don't force it.
Your DIY Removal Toolkit and Workspace Setup
A bad setup ruins removals that should have been straightforward. I see this a lot around North Metro Atlanta. The owner starts in the driveway at noon, grabs whatever heat source is in the garage, and ends up fighting brittle film, smeared adhesive, and paint they're now scared to touch.
If you're handling this yourself, the goal is control. Control of heat, control of lighting, and control of the panel you're working on. If you can't get those three right, you're better off stopping before the first corner lifts.

What you need on hand
Keep the tool list simple and automotive-safe.
- Low-heat source: A heat gun on a low setting or a hairdryer. You're softening adhesive, not trying to bake the panel.
- Plastic edge-lifting tool: A plastic razor blade or plastic squeegee helps start an edge without digging into paint.
- Automotive adhesive remover: Use a product labeled for painted vehicle surfaces.
- Microfiber towels: Bring several. Once a towel gets loaded with adhesive, retire it and grab a clean one.
- Nitrile gloves: Useful for adhesive remover and long peel sessions.
- Work light: Side lighting exposes residue and torn film edges that overhead garage lights miss.
One more practical point. Some owners mistake failing clear coat for leftover adhesive, especially on older hoods and mirrors. If you want a visual reference before you start scrubbing, this guide on how to repair damaged car clear coat helps you tell the difference.
Set up the workspace before you touch the film
The best DIY removal area is boring. A garage bay, a shaded carport, or a fully shaded driveway during mild hours gives you a stable panel temperature and enough time to work. Full sun creates hot spots fast, especially on dark paint, and those hot spots make film stretch, tear, or leave more glue behind.
Get the space ready first:
- Shade or indoor cover: Stable temperature makes the adhesive behave more predictably.
- Clean floor and low dust: Sticky adhesive attracts grit fast.
- Room to step back: You'll need space to peel in one smooth motion.
- Angled lighting: Residue shows up better from the side than from above.
If the area is windy, dusty, or cramped, that's a red flag. DIY is still an option for plenty of owners, but this is the line between a manageable project and a cleanup mess that costs more to fix later.
Use the right heat and test your setup first
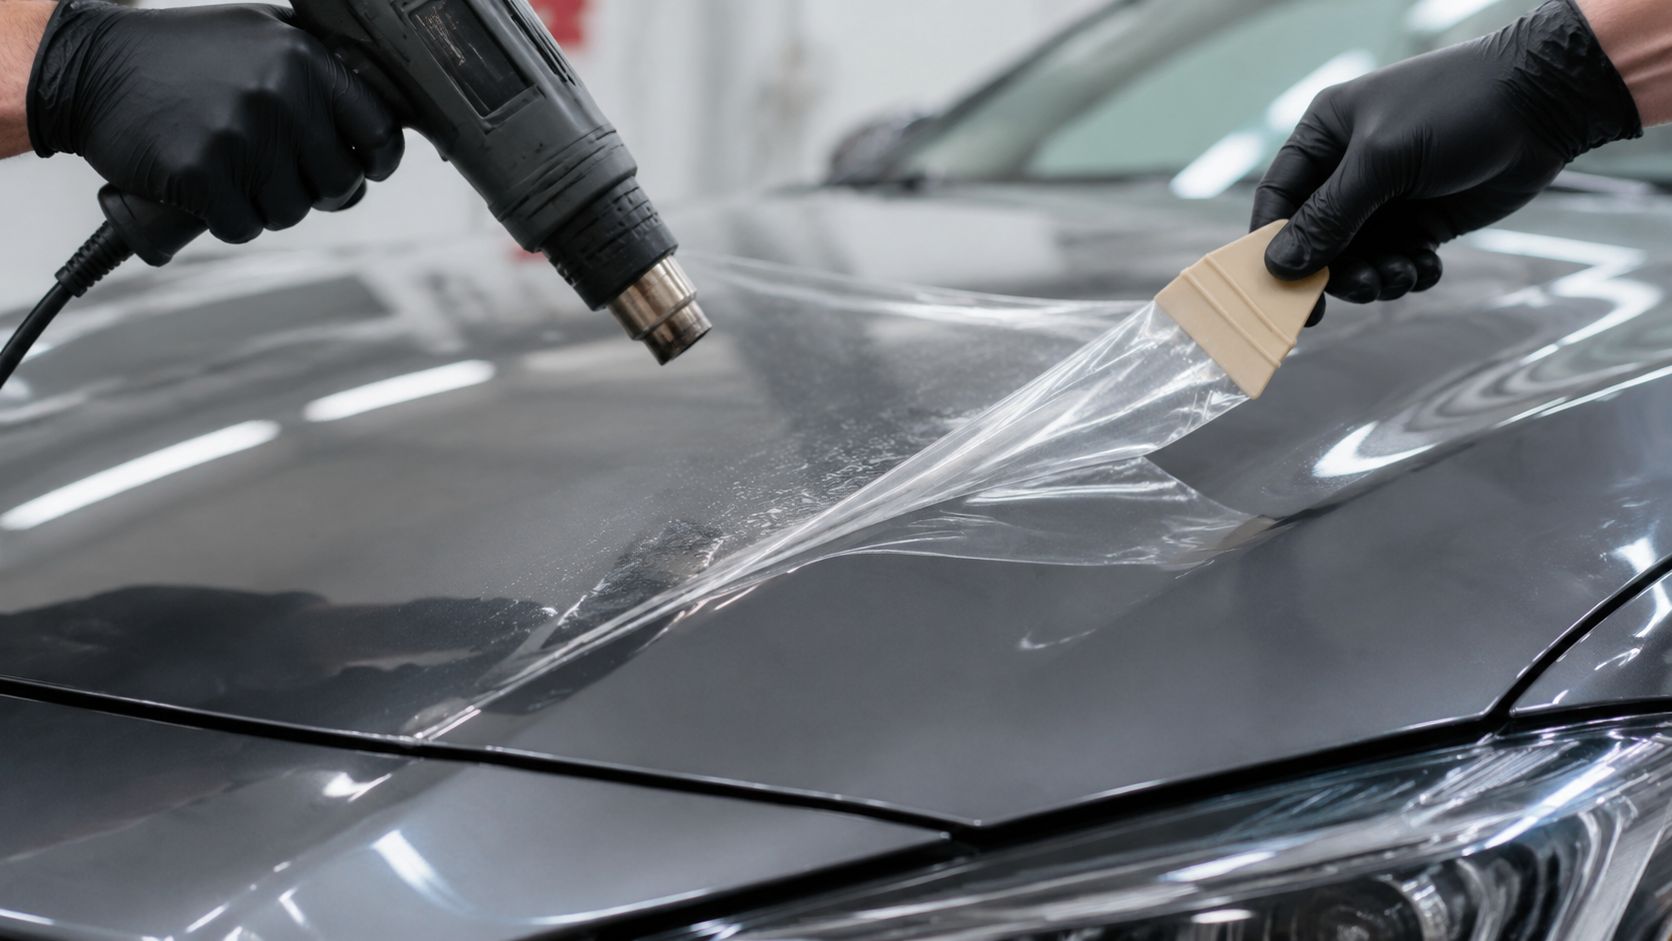
Heat and pull angle decide whether the job stays under control. A useful baseline, as explained in this removal technique guide, is low-to-medium heat with the tool held roughly 6 to 8 inches from the surface, then peeling the film back at about a 45-degree angle.
That does not mean every panel wants the same treatment. Older film on a horizontal hood in Georgia heat usually reacts differently than newer film on a door. Start with a small hidden area and watch how the material responds. If the film comes up in one piece and the adhesive stays manageable, proceed. If it snaps, gums up immediately, or feels welded to the paint, stop and reconsider whether this belongs in the DIY bucket.
That judgment call matters more than any tool on the list.
The Safe Paint Protection Film Removal Method
The cleanest removals are boring. Nothing dramatic happens. The film warms, lifts, peels slowly, and the residue gets cleaned panel by panel. That's what you want.
Start by washing and drying the area you're working on. Any grit left on the panel can get dragged around once the adhesive starts to soften. Focus on one section at a time instead of trying to loosen the whole front end at once.
A visual reference helps before you begin.

Start small and make the film release
Pick a corner or edge that already shows a slight lift if possible. Warm a small area evenly. You're not trying to make the film hot. You're trying to make the adhesive cooperative.
Use a plastic tool only to begin the lift if your fingernail won't catch the edge. Once you've got enough material to hold, switch to your hand. Hand control is smoother and usually safer than prying.
Pull the film low and back against itself. Don't pull straight up away from the panel. That upward rip is what creates extra resistance and more adhesive transfer.
The film should feel like it's releasing. If it feels like it's fighting you, give it more controlled heat instead of more force.
Keep the peel steady
As you move across the panel, maintain tension and keep the angle shallow. Small changes in pull direction can make a big difference. On older installs, one section can peel well and the next can start tearing the moment the adhesive cools.
If resistance increases, stop and reapply heat to the area just ahead of the peel line. Don't get impatient. Most ugly removals happen when someone gets one good strip off and decides the rest of the car will go the same way.
This is also where crossover skills from other adhesive jobs can help. If you've ever dealt with marine graphics, the logic is similar. Controlled heat, patient peeling, and residue management matter there too. This overview on how to remove boat decals is useful for understanding the broader adhesive-removal mindset, even though automotive paint needs more caution.
When the film tears
Tearing is common on aged or brittle PPF. Don't chase a torn strip aggressively with a scraper. You'll just create more edges and more frustration.
Instead:
- Rewarm the torn section: Cold brittle film keeps snapping.
- Find a wider grip area: A broader section usually peels more evenly than a narrow string.
- Shorten your working zone: Remove smaller sections instead of trying to drag off a long sheet.
- Keep your pull angle low: The lower the pull, the cleaner the release usually is.
Sometimes a panel that looked manageable on the first pass starts failing halfway through. That's your sign to reassess. There's no prize for finishing a bad DIY removal.
A video walkthrough can help you see the pace and pull angle before you try it on your own car.
Adhesive cleanup is where patience pays off
It's commonly thought that the hard part is peeling the film. Often it isn't. The hard part is what's left behind.
The main failure mode in paint protection film removal is adhesive residue and film tearing on aged or brittle installations, and a solid cleanup process is to use a purpose-made automotive adhesive remover, then finish with microfiber towels and inspect for remaining residue before any polishing, based on this detailing removal guide.
Don't flood the panel. Apply remover to the residue, allow it to work briefly, then wipe gently with a clean microfiber towel. Fold the towel often so you're not smearing sticky debris back over the paint.
Final inspection after each panel
Before moving on, inspect the panel from multiple angles.
Look for:
- Smears that feel tacky
- Small adhesive islands near edges and body lines
- Bits of torn film left at corners
- Marks that may be residue, not paint damage
If you plan to polish or rewrap later, this inspection matters. Leftover adhesive can foul pads, interfere with new film, and make the surface look worse than it is.
The safest removals are methodical. One panel. One section. One cleanup pass at a time.
When to Call a Professional in North Atlanta
You get one corner lifted, the film comes up in thumbnail-sized pieces, and the adhesive stays on the paint like old duct tape. That is usually the moment a weekend job turns into a repair bill.
A lot of owners in North Metro Atlanta can remove PPF themselves if the film is still healthy, the panel is original paint, and the car is set up in a clean, controlled space. The problem is that many removals do not start under those conditions. Aged film, unknown paint history, and big horizontal panels change the job fast.

Red flags that should stop a DIY removal
Some jobs give you a warning early. Listen to it.
- The film snaps instead of peeling: Brittle film usually means slow progress, constant tearing, and a lot of adhesive left behind.
- The car may have repaint work: Body shop paint can be perfectly fine, or it can be weak at edges and more likely to lift during removal.
- The panel is large and sun-beaten: Hoods, roofs, and bumpers that have lived outside for years are often the ugliest removals.
- Edges are already failing in random spots: Uneven failure usually means uneven removal. One section releases cleanly while the next fights you.
- You cannot control temperature, lighting, or time: Cold panels, poor visibility, and rushing the job lead to bad decisions.
- Your test area already looks rough: If a small section is tearing, smearing, or taking too much force, the rest of the car usually gets worse.
For drivers in Woodstock, Kennesaw, Canton, Alpharetta, and Roswell, I would be especially cautious with older installs that have baked through a few Georgia summers. Those are the cars that fool people. The film looks removable until it is not.
What you are paying a pro to handle
Professional removal is labor-heavy, but the main value is judgment. A good installer knows when to add heat, when to back off, when to change pull angle, and when a panel needs a safer plan because the paint underneath is questionable.
That matters most on repainted panels, sharp body lines, mirrors, bumpers, and wrapped edges. Those areas punish impatience. DIY attempts often go wrong because the owner keeps pulling after the film starts fighting back.
Reality check: If you are asking whether brute force will get the rest of the film off, it is time to stop.
A shop also has a better setup for the parts that drag a removal out. Controlled heat, proper lighting, multiple adhesive removal options, and enough towels to keep residue from getting smeared back across the panel all make a difference.
Where DIY mistakes get expensive
Here is where the bill usually grows:
| Problem | What it can lead to |
|---|---|
| Film tearing into tiny pieces | Hours of extra labor |
| Adhesive packed into edges and trim | Longer cleanup and more risk around sensitive areas |
| Scratches from aggressive wiping or scraping | Polishing or paint correction |
| Lifted paint on a repainted panel | Body shop repair, not just film removal |
| Dirty or poorly prepped surface after removal | Delays before new protection can go on |
If your plan is to strip the old material and install new film right away, the surface has to be right. This guide to paint protection film installation explains what the panel needs before fresh film goes down.
The local answer
North Atlanta cars see a rough mix of heat, humidity, pollen, and daily driving. That combination ages film unevenly. I see cars where the fenders come off fine, then the hood turns into a sticky, brittle mess. That is normal around here.
Call a pro if the film is cracking, if the paint history is unknown, if the car has had body work, or if you need the finish clean and ready for correction or reinstallation without surprises. DIY removal can save money on the right car. On the wrong car, it usually costs more than it saves.
What to Do After the PPF is Gone
Removing the film is only half the job. What the paint looks like after removal determines what happens next.
Even if the removal went well, the surface may not be fully ready for the road or for a fresh install. Some sources explicitly recommend polishing the paint and reapplying protection after removal, which tells you something important. Successful removal doesn't always mean finished paint, as explained in this post-removal planning guide.
Inspect the surface with clean eyes
Once the adhesive is gone, look at the panel in strong angled light. You're checking for leftover residue first, then surface condition.
Common things to look for:
- Adhesive smears you missed the first time
- Marring from residue cleanup
- A difference in gloss between protected and unprotected panels
- Old chips or defects that were hidden under the film
A light polish may be enough on some cars. Others need more serious paint correction before they look uniform again.
Don't leave the paint bare longer than necessary
Freshly exposed paint is still paint. It needs protection.
Your next move usually falls into one of these lanes:
- Reapply PPF: Best when you want impact protection back on high-hit areas.
- Ceramic coating: Useful when the goal is easier washing and gloss, not film-style chip resistance.
- Mixed strategy: Film on vulnerable panels, coating elsewhere.
If you're comparing options, this outside car paint protection products guide gives a broad overview of the differences between common protection choices.
Match the next product to how you use the car
A weekend car and a daily driver in North Atlanta don't need the same thing. If your vehicle lives on highway miles, fresh PPF on the front end makes more sense than leaving those areas naked. If you removed old film from a lower-risk panel and mainly want easier maintenance, another protection route may fit better.
This is also the point where one local option is to have a film-focused shop handle the next stage. The Tint Guy provides automotive film services in North Metro Atlanta, so owners who need surface prep followed by new protection can keep the process in one lane instead of bouncing between different shops.
The main thing is not to stop at removal. Clean surface, honest inspection, any needed correction, then new protection. That's the full job.
If your car in Woodstock, Kennesaw, or Canton has aging PPF and you're not sure whether it's a safe DIY job or a pro-level removal, talk to The Tint Guy. A quick look at the film condition and paint history can save you a lot of cleanup, guesswork, and avoidable damage.