You're probably here because the rear of your car looks a little too stock. You've seen smoked tail lights on builds around Woodstock, Kennesaw, or Canton, and the look works. It sharpens the lines, tones down bright red plastic, and gives almost any car a cleaner finish.
That instinct makes sense. Tail light tint installation is one of those mods people assume is simple, cheap, and mostly cosmetic.
In Georgia, that's where people get into trouble. The visual appeal is real, but so are the legal and safety consequences. So the smart way to approach this topic is to answer the harder question first: should you do it at all? Then, for anyone determined to understand the process, it helps to know what works, what usually fails, and why professional legal alternatives are the better move for drivers in North Atlanta.
The Allure of Smoked Tail Lights
A lot of DIY projects start in a driveway with a phone in one hand and a parts cart open in the other. You wash the car, stand back, and notice the same thing most enthusiasts notice. The paint looks good, the wheels are right, the windows may already be tinted, but the tail lights still feel too bright and factory.
That's why smoked lenses have stayed popular in car culture. On a black truck in Canton, a white sedan in Kennesaw, or a gray SUV in Woodstock, darker tail lights can make the rear of the vehicle look more cohesive. It's an aesthetic move first.
The problem is that tail lights aren't trim pieces. They're safety equipment. The second you darken a brake light or turn signal lens, you're not just changing style. You're changing visibility for the driver behind you.
Smoked tail lights look subtle in daylight. At night or in bad weather, subtle can turn into reduced reaction time.
That's the conflict Georgia drivers need to understand. You can absolutely learn the mechanics of tail light tint installation, but the how matters less than the consequences of doing it on a road car. Around North Atlanta, I've seen people assume light smoke is harmless because it isn't a full blackout look. That assumption is where tickets, failed inspections, and removal jobs begin.
Why people still consider it
A few reasons come up over and over:
- Styling consistency: Drivers want the rear lights to match black wheels, chrome delete, or a darker overall build theme.
- Temporary experimentation: Some people want a reversible look before committing to aftermarket light assemblies.
- DIY appeal: Film seems approachable. It's smaller than window tint, and the lenses feel less intimidating than doing a full side window.
All of that is understandable. But in Georgia, this isn't a harmless gray-area mod. It's one of those changes that can look minor in the garage and create a real issue on the road.
Georgia Law and Tail Light Tinting What You Must Know
If you live in Woodstock, Kennesaw, or Canton, the legal answer is straightforward. Tail light tinting is illegal in Georgia. State code requires brake lights, tail lights, and turn signal lenses to remain to original specifications without aftermarket tinting, and violations can bring misdemeanor charges, fines up to $1,000, and imprisonment up to 12 months, with no VLT tolerance allowed for safety lighting, as outlined in Georgia tail light tint legality guidance citing 40-8-23 and 40-8-26.

That's the key distinction a lot of drivers miss. Georgia does allow some window tint, but it does not treat tail light lenses the same way. There's no small allowance for “just a light smoke” on rear lighting. No legal variance. No practical loophole based on appearance alone.
Window tint and tail lights are not the same thing
Georgia's window tint law gives drivers a measurable standard. Front side windows can be tinted to a minimum 32% VLT with a 3% tolerance, reflective tint can't exceed 20% reflectivity, and the front windshield can't be tinted at all, according to Georgia window tint regulations and this Georgia tint law summary on reflectivity limits.
Tail lights don't get that treatment.
There's no legal measurement that says a certain smoked level is acceptable on the lens. That's why comparing tail light film to legal window film is a mistake. One is regulated with specific allowances. The other is prohibited because it affects essential signaling equipment.
For drivers who want a broader explanation of light tint concerns, this guide on tinted lights on a car is worth reviewing before buying film.
Why enforcement matters
This isn't just about paperwork. Brake lights and turn signals are there to communicate instantly, especially in rain, fog, traffic, and low light. If the lens output is reduced, the driver behind you gets less warning.
Practical rule: If a modification makes a safety light harder to see, Georgia is going to treat that very differently than cosmetic glass tint.
A lot of people only think about the cost of the film. They don't think about removal, wasted labor, or getting stopped for something that was avoidable from the start. In North Atlanta, the better path is usually to put that customization budget into legal upgrades that improve comfort and appearance without creating a compliance problem.
Your DIY Tinting Toolkit Tools and Materials
A tail light tint job usually goes wrong before the film ever touches the lens. The problem is usually the kit. Cheap material, weak heat, dirty prep towels, and a dull blade will turn a simple lens into a wrinkled, edge-lifting mess.
If someone in Georgia is still set on trying this for learning purposes, use film, not spray. Film gives you one practical advantage. It can be removed. Spray tint is permanent enough to create bigger problems if the finish comes out blotchy, too dark, or uneven from side to side.

I tell North Atlanta drivers the same thing I tell first-time window tint DIYers. Buy the material once, or buy it twice after the first attempt fails. A lot of the same prep and handling errors carry over from glass film work, so this guide to DIY window tint basics is still useful for understanding slip control, squeegee pressure, and clean cutting habits.
What belongs in the kit
A workable setup is short, but each tool has a job:
- Cast or high-quality conformable vinyl film: Better film stretches with control, recovers better with heat, and resists whitening on corners. Cheap calendared film fights compound curves and often shrinks back at the edges.
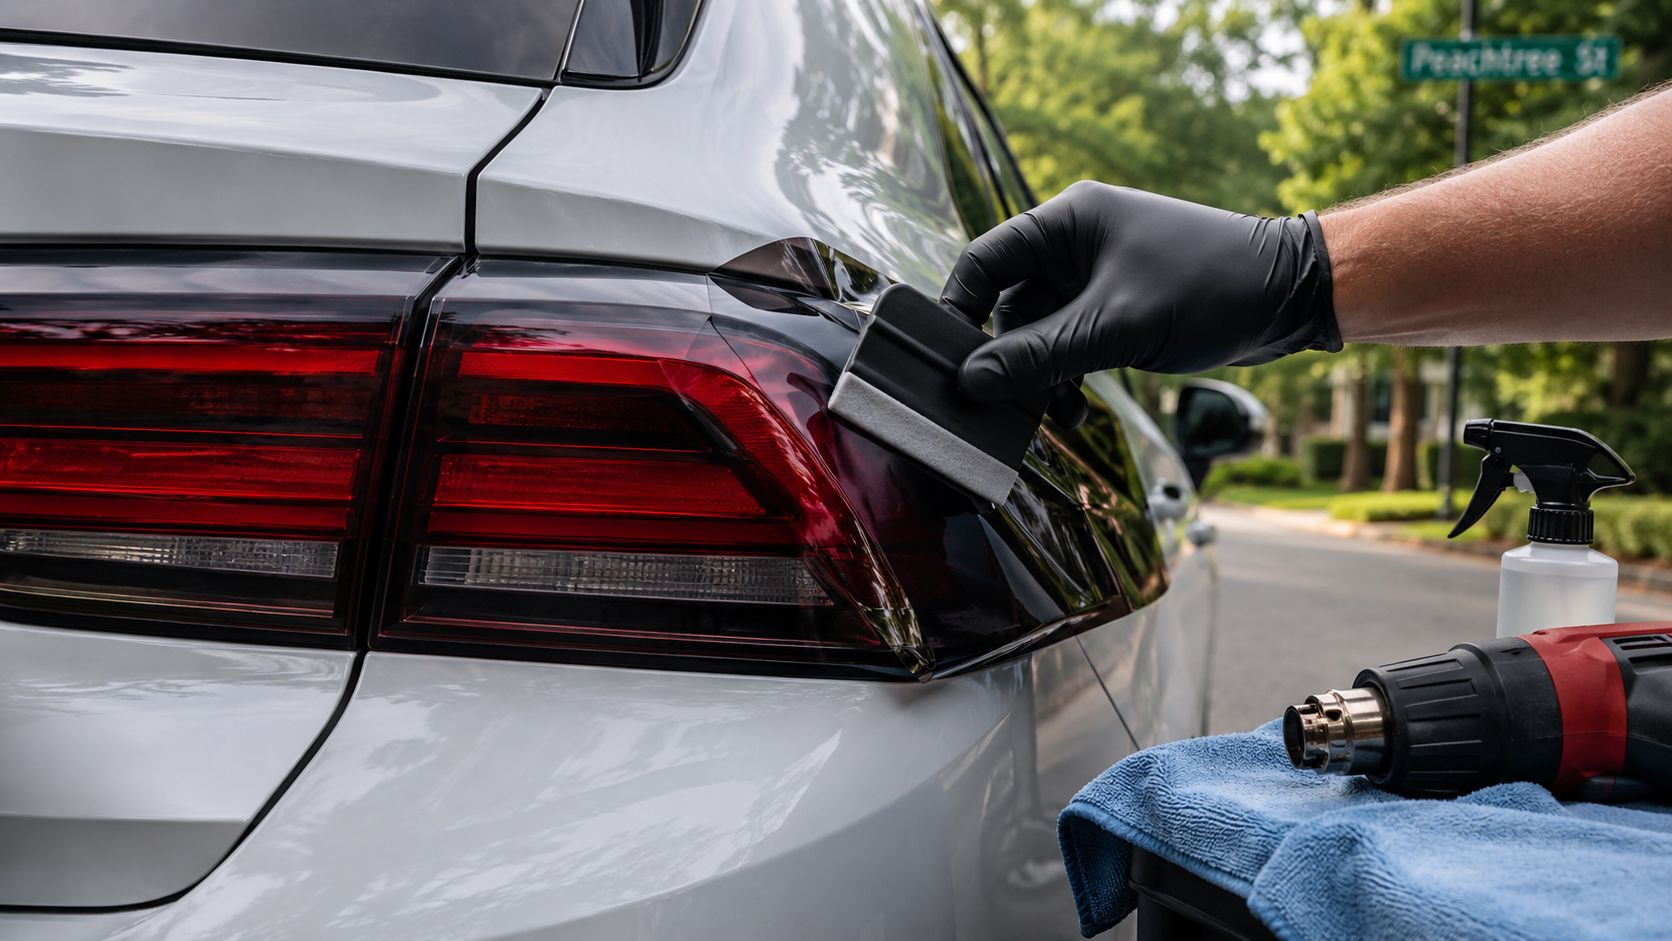
- Heat gun with adjustable output: Tail light lenses have curves and recessed pockets. Controlled heat helps the film relax into those shapes without overstretching it.
- Spray bottle with slip solution: A light, even mist lets you position the film and squeegee out moisture without flooding the lens.
- Firm squeegee with a soft or felt edge: You need enough pressure to push solution out, but not so much that you scar the film.
- Clean microfiber towels: One towel for drying, one for final wipe-down. Reusing a towel with wax or dressing on it is a common cause of edge failure.
- Fresh precision blade or breakaway knife: Tail light film needs clean trimming around tight borders. A dull blade drags, tears, and leaves jagged edges.
- Isopropyl alcohol: This removes polish residue, silicone, road grime, and leftover protectants that stop adhesive from bonding.
- Nitrile gloves: They help keep fingerprints, skin oils, and lotion off the adhesive side of the film.
Where low-cost kits fail
The problem with bargain kits is not just the film thickness. The whole package is usually off. The applicator flexes too much, the film has weak adhesive control, and the instructions skip the part that matters most, which is how to manage tension around corners and edges.
That is why first attempts often fail at the same spots. Outer corners. Reverse curves. Narrow wrap-around edges. A beginner pulls harder, heats more, and stretches the film thin. Then the edge lifts a few days later, especially after sun exposure or a wash.
Film versus spray
| Method | Best use | Main downside |
|---|---|---|
| Vinyl film | Reversible cosmetic application | Sensitive to contamination, tension, and trimming mistakes |
| Spray tint | Permanent custom finish | Hard to control, harder to remove, easy to apply unevenly |
For anyone determined to experiment, film is the less risky material. That does not make it low-risk. In Georgia, removability matters because a cosmetic decision may need to be reversed quickly if visibility, finish quality, or legal concerns become a problem.
From a shop perspective, professional service is still the safer route. A proper install uses better film, better heat control, and cleaner prep standards, and it keeps drivers from wasting time and money on a lens that ends up looking worse than it did stock.
A Step-by-Step Guide to Applying Tail Light Film
You finish the install, step back, and the lights look clean in the driveway. Two hot Georgia afternoons later, the corners start lifting, moisture shows at the edge, and now you have a darker lens that may draw the wrong kind of attention. That is how a lot of DIY tail light tint jobs go.
Tail light film can be installed at home, but the margin for error is small. On a modern lens, you are dealing with compound curves, tight edges, and a surface that shows every speck of dust. If you live in Georgia, there is another issue. A bad install does not just look cheap. It can reduce light output and create legal exposure if the tint is too dark or the finish interferes with visibility.

Start with the lens, not the film
Wash the lens thoroughly and dry it by hand. Then wipe it with isopropyl alcohol to remove wax, polish residue, and dressing from the edges. I pay extra attention to the seam where the lens meets the body panel because that is where hidden contamination usually ruins adhesion.
Inspect the surface under strong light before you peel the liner. Pits, chips, bug residue, and old road film will show through tinted material. Film does not hide defects. It highlights them.
Oversize the piece and map the lens shape
Cut a piece larger than the lens by at least a small working margin on every side. Extra material gives you room to align the sheet and handle the curves without loading tension into the edge from the start.
Before you apply anything, hold the film over the lens and study where the shape changes. Most tail lights have one area that needs light stretch and another that needs the film to shrink into a recess with heat. Treating those two areas the same is how beginners crease or over-thin the material.
Set the center first
Use a light mist of slip solution on the lens, then lay the film in place. Too much solution makes the piece wander. Too little makes it grab before you are aligned.
Once the position is right, lock down the center with short, firm squeegee strokes. Build a stable section in the middle, then work outward. That sequence matters because the center controls how the film relaxes across the rest of the lens.
A clean center makes the corners manageable. A bad center makes every edge fight back.
For a visual walk-through of the handling and flow, this install video is useful:
Use heat in small doses
Warm the film gradually and watch the surface. The goal is to relax the material so it conforms to the lens. The goal is not to cook it into place.
On rounded corners, use light heat and short passes with your hand or squeegee. If the film starts to gloss unevenly, distort, or drag, stop and let it cool for a moment. Overstretching usually looks acceptable for a day or two, then the memory in the film pulls the edge back.
This is one reason shop installs hold up better. Controlled heat takes practice, and tail lights give you very little room to hide mistakes.
Trim with intention
Trim after the film has laid down and most of the moisture is out. Use a fresh blade and follow the lens edge cleanly. A dull blade snags the film and leaves a ragged perimeter that starts lifting early.
Some lenses allow a slight wrap for better edge protection. Some do not. If the body gap is too tight, forcing a wrap can make the edge bunch up or catch when the panel flexes. That trade-off is worth judging before you cut.
Post-heat and seal the perimeter
After trimming, make one more controlled pass around the edges with light heat and firm pressure. Focus on corners, points, and wrap-around sections. Those areas fail first.
Do not keep chasing tiny imperfections once the film is set. Reworking the same spot over and over usually stretches it thin or marks the finish. If a section is badly creased or contaminated, replacing that piece is the cleaner fix.
Let it cure before you judge it
Fresh film often has a little haze or minor moisture pockets. That can settle as the adhesive bonds. Leave it alone, keep the lens dry, and skip car washes for the first couple of days.
If the result ends up too dark, uneven, or questionable for road use in Georgia, remove it sooner rather than later. A clean removal is easier before the adhesive fully ages, and the process is similar to removing old automotive window tint without damaging the surface.
What a good finish looks like
A proper install should have:
- Even shade: No blotchy areas, stretch marks, or silvering.
- Controlled corners: No fingers, tunnels, or raised channels at the curves.
- Clean perimeter: The edge should follow the lens shape without jagged cuts.
- Sharp lens definition: The housing lines should still look crisp through the film.
If it only looks good from ten feet away, it is not done well enough. Tail lights sit at eye level in traffic. In North Atlanta, where bright sun and regular washing expose every flaw, mediocre work does not stay hidden for long.
Avoiding and Fixing Common Installation Mistakes
A lot of first-time installs look fine in the garage and start failing a week later. Corners lift, a speck under the film catches sunlight every time the brakes come on, or the shade ends up dark enough to invite the wrong kind of attention in Georgia. That is the common pattern I see around North Atlanta. The problem is rarely one dramatic mistake. It is usually a stack of small ones.
The three trouble spots are contamination, tension, and heat control. Miss any one of them and the film will fight you.
The most common problems
- Trapped dust or lint: A single particle under tail light film stands out more than it does on side glass because the lens is reflective and textured. If the film is still fresh, lift that area carefully, remove the contamination, re-wet if needed, and lay it back down. If the speck has already created a crease or stretch mark, replace the piece.
- Bubbles that do not settle: Tiny moisture pockets can clear during cure. Sharp-edged bubbles usually mean air was sealed in or the film bridged over a recess. Poking at them blindly often leaves a permanent scar in the finish.
- Wrinkles and fingers near curves: Tail lights have compound curves, and film does not shrink evenly in every direction. Heat can help the material relax, but too much heat or too much pull will distort the shade and weaken the adhesive at the edges.
- Corner lift: This usually traces back to leftover wax, silicone, dressing residue, or overstretched film. On some lenses, aggressive body lines also create tension points that a DIY kit struggles to hold long term.
What helps
Start with a cleaner lens than you think you need. A tail light can look spotless and still carry residue from spray wax, quick detailer, or old road film. If a corner keeps lifting, I assume contamination first and technique second.
Slip solution matters too. Film needs enough lubrication to position cleanly, but not so much that it keeps floating while you try to lock down edges. A small amount of alcohol added to the mix can help the film grab faster in edge and corner areas, which is a common vinyl wrap technique noted by 3M's guidance on application liquids for film installs. The trade-off is shorter working time. Beginners often make the mix too aggressive, then wonder why the film grabs before it is aligned.
Temperature changes the whole job. Cold film gets stiff and wants to tent over contours. Overheated film turns soft, stretches too far, and later tries to pull back. Keep the panel and the material in a moderate indoor range, and use heat in short passes instead of cooking one spot.
Shade selection causes its own problems. Very dark smoke hides flaws on the bench and exaggerates them once installed on the vehicle. It also cuts visible output from the lamp, which is exactly why Georgia drivers need to be careful. The state law issue does not disappear because the install looks clean. If the lens output looks muted in daylight or muddy at night, remove it.
If a section needs repeated reheating just to stay down, the film was either overstretched or laid with tension in the wrong direction.
When to stop correcting and start over
There is a point where reworking costs more than replacing the piece. White stretch marks, hard creases across the center, knife marks near the edge, and contamination trapped in the main viewing area usually fall into that category.
Removal is also the smart move if the finished lens looks too dark for safe road use. For adhesive cleanup and safe peel-back methods, the process is similar to removing old automotive window tint without damaging the surface.
That is one reason I push drivers in Woodstock, Kennesaw, and Canton to treat DIY tail light tint as an experiment, not an upgrade plan. You can learn a lot doing one set yourself. But with Georgia enforcement, uneven film quality, and the risk of reducing brake light visibility, professional help is the safer call if you want the car to look sharper without creating a legal problem.
DIY vs Pro The Smarter Choice in North Atlanta
A lot of North Atlanta drivers reach this point after the first install attempt. The film is on, the lights look darker in the driveway, and then serious questions show up. Does it look clean up close? Will the edges stay down through heat and rain? Is it worth putting money into something that can still create a Georgia equipment issue?
That is the part DIY videos gloss over.
By the time you buy film, a decent squeegee, slip solution, prep supplies, extra blades, and enough material to recover from one bad attempt, the price gap narrows. The bigger difference is consistency. A first-time install can come out acceptable from ten feet away, but tail lights are full of curves, recessed edges, and textured lens details that expose every trapped speck, lifted corner, and stretch mark.

What the comparison really looks like
| Factor | DIY tail light film | Professional legal vehicle tint work |
|---|---|---|
| Upfront cost | Lower material spend at first | Higher service cost |
| Time | Personal labor, retries, cleanup, removal if it goes wrong | Faster turnaround with fewer surprises |
| Finish quality | Varies heavily with skill, film quality, and patience | More precise and repeatable |
| Legality in Georgia | Tail light tint still carries legal and safety risk | Legal services can stay compliant |
The legality row is the one Georgia drivers need to treat seriously. A clean install does not make a darkened tail light legal. If brake and running lights look muted, especially in daylight or bad weather, the modification has already crossed into the wrong territory from a safety standpoint, even before an officer takes interest.
For drivers in Woodstock, Kennesaw, and Canton, the smarter question is not who can tint the tail lights best. It is which upgrade improves the vehicle without creating a visibility problem or a reason to peel the work back off a month later.
A better way to spend the budget
If the goal is a cleaner look and a better daily driver, professional window tint usually gives a stronger return. It improves the appearance of the vehicle, cuts glare, adds privacy, reduces cabin heat, and helps protect the interior. It can also be installed within Georgia law when the film is selected and measured correctly.
That is why shops that know North Atlanta tend to steer people away from smoked tail lights and toward compliant upgrades that hold up in real use.
Bottom line: DIY tail light tint can teach the process. It does not reduce the legal risk in Georgia.
If you're in Woodstock, Kennesaw, or Canton and want a legal upgrade that improves comfort, appearance, and daily drivability, talk to The Tint Guy. They focus on professional automotive tinting for cars, trucks, SUVs, vans, and Teslas, with North Atlanta service built around clean installs, compliant film options, and results that hold up.